Friday, 30 January 2015

Maple Cardigan - part two


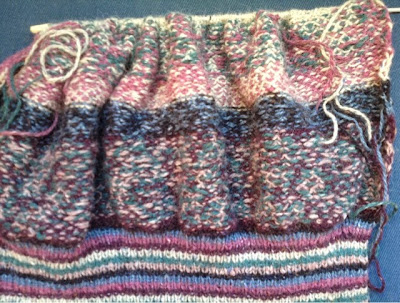
I have found that I am becoming slightly quicker with catching every loose thread at the back of the work and I am enjoying it more.  I think this will result is a more dense and less stretchy knit.


Tuesday, 27 January 2015

Apple Blossom Appliqué - 3

I decided to mount my apple blossom applique on to some medium weight Lutrador ( a versatile man made fabric which may be purchased in different weights),  which I had spray painted with various green paints over some crayon doodles.

 I trimmed the Lutrador with a rotary cutter leaving a 3cm border.


I wanted to attach a channel on the back of the embroidery so that a strip of wood could be passed through for hanging, so I cut a strip of Lutrador and pinned it in place.

The strip had to be sown on before the Lutador backing was attached to the embroidery so I separated the two pieces while I did this.  I sewed on the top edge of the channel and then added the wood strip while I pinned it in place.  This was because the wood was curved and I wanted to allow extra room so that it would not distort the finished piece.  Once I had pinned the channel in place I removed the wood and sewed along the bottom edge.


I then laid the embroidery back in position over the Lutrador and sewed the two pieces together around the embroidery edge, making sure the hanging sleeve was at the top.

The border was then trimmed back to 2cms and I sewed on a curtain ring just above the wood channel on the centre back.

The embroidery was finished and may be hung as is or framed.

Tuesday, 20 January 2015

Apple Blossom Appliqué - 2


After all of the flowers and leaves had been sewed on I added one more larger flower on top as a focal point.  This was also bonded and stitched down in the same way.  To knock back the piece I then used a roller to add some white acrylic paint in areas.

To add some interest to the flower centres I used an automatic daisy pattern in three colours, followed by some hand stitched French Knots.


The piece just needs to be signed, trimmed and mounted.

Thursday, 15 January 2015

Apple Blossom Appliqué - 1

I have been working on a new textile piece in my apple blossom series.  The background was constructed out of collaged fabrics which I had painted, stamped and stencilled.  After I had arranged the pieces on a calico background,  I stitched them all down with rows of running stitch by sewing  machine in a slightly haphazard way so that the look was not too perfect

I then took some simplified flower designs from my apple blossom sketchbook, traced them onto bondaweb, ironed them onto the backs of different fabrics and cut them out.  I played around with the arrangement until I was happy with the spacing and ironed them on after removing the backing paper. I then sewed around the edge of each one with a free machine embroidery stitch using black rayon thread.


I bonded on some more blossoms and some leaves in the same way and stitched them on with some green and pink rayon threads.

I have stitched around each piece several times so that edges are not too precise.

Monday, 12 January 2015

A Year in Pictures - 2014

 For some strange reason this post became stuck in schedule instead of being posted in the last week of January.  Better late than never as the saying goes!

January

The year started with us being cut off from the main road for 3 weeks because of the floods.  We had to have one of our cars towed out which we parked at the end of the bridle way.  We had to walk the bridle way river each time we went out and often in the dark navigate it with all of our shopping.

Our two girls, Himani (underneath) and Mishti catching some Winter sun in the conservatory.
February

The nearby fields were still flooded but the snowdrops were gorgeous underneath the old apple trees and behind the barn.
March

I took a workshop with Jill Flowers at Newbury Embroiderers Guild and made a corsage out of paper.


A hare visited us and stayed for an hour for the first time.  We have seen them in the distance but they have never ventured into the courtyard.

April

Easter rocky road, a family favourite.
Some ferns uncurling their leaves in
the drive.


May

The delphiniums in this neglected bed grow amazingly high.

Our apple trees are very old but still send forth the most gorgeous blossom.


June

One of the last trips in my camper van to Longlete.  Unfortunately the weather was terrible and Sonia my sister was ill.  We made the most of it though.

A barn owl became stuck on the roof and the fire brigade had to come and rescue her.  I will tell you her story in another blog next year.


July

I decided after 5 years that I would sell my camper van because of several reasons.  I will miss her a lot but it is a relief that I do not have to drive her anymore as my every day car.  I bought a mini which I can nip around in and named him Guo (Jo). Guess why?!
I visited Wells Cathedral with my husband Bijan.  It is a beautiful and interesting place to visit and we had the perfect weather.
August

Festival of Quilts time and I went as usual with a group of friends.  Sonia was too ill to go which was such a shame.  Next year we are going to make sure we make up for all the things she missed because of her ill health.  I entered this wall hanging named "My Favourite Mug".

I went with Bijan to Historic Portsmouth and thought it was brilliant.  We want to go back again  next year as there was such a lot to see.
September

Hydrangeas are one of my favourite plants and I dried many of them over my AGA.  I would like to do some work on this theme.
I held a Halloween party and my niece of 12 years made an amazing horror cake.  All of the layers were different colours and in the middle were some smarties. Apart from helping her use my AGA she made it all her self. She came up with the idea after seeing a multi colour cake on Pinterest.
Autumn colours on a walk.  Just lovely.
 November

We took a trip to London to see the Poppies and the Tower of London.  Afterwards we took a cruise down the Thames.


We also took a trip up to London to visit The Shard and Burrough Market.


December

Frosted artichokes in the garden
I dressed as an angel at my younger sister Jeannie's fancy dress party. We had a brilliant time!  We didn't have a very good year to say the least but we did  have a wonderful Christmas.
Tuesday, 6 January 2015

Shabby Chic Braid Pincushion Tutorial

Materials

one tuna tin
Calico measuring  7 inches square
soft toy or cushion stuffing
two medium sized buttons
strong thread ( I used quilters thread)
perle thread
sewing kit
shabby chic braid measuring approximately 12 inches
pva glue
felt measuring 3 3/4 inches
chalk pencil or other marking pencil


1/   wash your tuna can and make sure that any sharp edges are bent inwards.
2/   Draw and cut out a paper template of a circle  with a diameter of 6 1/2 inches.  Pin the template to some calico or other decorative fabric and using it as a guide, cut a fabric circle out the same size.


3/   Make a ball of some toy or cushion stuffing.


With some strong cotton ( I used quilting cotton)  thread a needle and bringing both ends of the thread together, tie them in a knot.  The thread should now be double.  Sew a running stitch around the edge of the circle about a 1/4 inch in from the edge.


4/   When you complete the circle loop the two threads together and pull on both to bring  in the sides of the circle.  Place the stuffing into the center of the circle so that once the edges are pulled tight the  ball should be nice and firm.  Tie a double knot with the thread to hold everything in place.


5/   Thread a needle with some perle cotton and make a few anchoring stitches near the hole on the bottom of the ball. Place one of the buttons over the hole and sew up and down through the holes to keep it in place. Then take the thread through the center of the ball and up out  on to the center front.

 Keeping the cotton quite loose at this stage wrap it around the side of the ball and through one of the button holes on the ball bottom and up though the centre of the ball again.  Repeat this proceedure 6 times leaving the cotton in a different area around the sides of the ball, so that it is divided  into equal segments.


6/   Once the ball has been wrapped 6 times adjust the cotton until you are happy with spacing and then pull on the threads one at a time making them tighter and pulling in the sides of the ball.


   The back of the ball.


7/   Once everything has been tightened, take the thread up through the ball again and through the second button so that it is placed in the centre of the top of the ball.  Bring the thread down though the button and through the button at the bottom of the ball and again up through the top button so that it is secure.  Tie the thread off by looping it around some of the strands over the bottom button.


8/   Push the fabric ball into the tuna can.  It should be firm and stay in place.  Some pva may be added in the can before hand if you wish.
9/   Trim your shabby chic braid so that the ends overlap each other by about 1/2 inch.  Add some pva glue on the underside of the braid and place it around the sides of the can.  Hold it in place a a couple of minutes until the glue starts to set.
10/   Place the tin onto some felt and with a chalk pencil or water soluble pencil trace around the bottom edge.  Cut out the felt circle just inside the drawn line and with some extra pva stick it underneath the can.
The finshed pin cushion.