
Note - You need to know how to free machine stitch to make this project.
You need to be able to drop the feed dogs of your sewing machine so that it can move inependently and have a free machine or darning foot.
pelmet vilene measuring 12 inches by 4 inches
2 pieces of bondaweb each measuring 12 inches by 4 inches
2 pieces of gold or silver fabric each measuring 12 inches by 4 inches
freezer paper or ordinary paper measuring 12 inches by 4 inches
gold or/and silver beads and sequins
I large bead or crystal to hang in the centre
gold or silver thin braid or cord for hanging
water soluble material ( I used Julliette)
machine silver or gold thread
sewing kit
iron and ironing board
silicon paper or baking parchment to protect the decoration and your ironing board and iron
sewing machine
1/ Using the silicon or parchment paper to protect your ironing board, place one piece of the bondaweb paper to one side of the pelmet vilene with the paper side upwards. Lay over some more parchment paper to protect your iron and without using steam, iron it on. When the vilene is cool, peel off the paper and lay the silver or gold fabric on top of it, right side upwards. Again covering it with parchment paper iron the fabric to the vilene. Repeat this process on the other side of the vilene so that it has been covered both sides with fabric.


Cut each ring out.


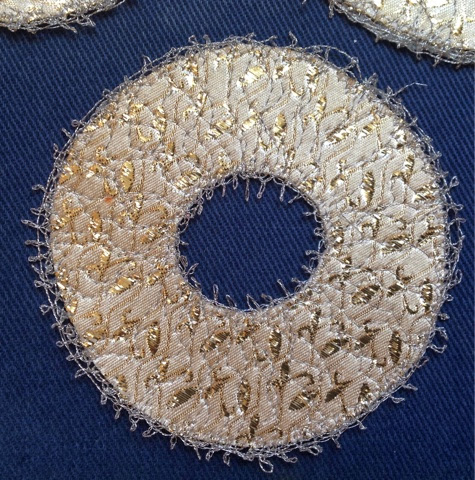
Starting in the centre, I sewed on and off of the edge of the ring making little tails out onto the water soluble material, and moving around the ring. After I had finished the centre I sewed a wiggly line across the ring to the outer edge and repeated the process again. After that I sewed a running stitch on the water soluble material linking all of the tails to give them a little more support.
To finish the rings I stitched around them from the inner to the outside edges in wavy over lapping lines until the whole piece was sown together and decorated.


7/ Leave somewhere flat to dry.
-Continued in Christmas Decoration - part two - tutorial.
No comments:
Post a Comment